Ribs on the Grill: A Masterclass in Backyard BBQ Perfection
The aroma of perfectly smoked ribs, their glistening surface hinting at fall-off-the-bone tenderness, is the epitome of summer grilling. But achieving that smoky, juicy perfection requires more than just tossing some ribs on the grill and hoping for the best. This comprehensive guide will walk you through every step, from selecting the right cut to mastering the art of the low-and-slow cook, ensuring your next ribs on the grill are the best you’ve ever tasted.
Choosing Your Ribs: A Cut Above the Rest
The foundation of any great BBQ experience begins with the right cut of ribs. Generally, you’ll find two main types readily available: baby back ribs and St. Louis-style ribs. Baby back ribs are shorter, meatier, and often considered more tender, while St. Louis-style ribs are wider, flatter, and offer a slightly more robust flavor profile.
- Baby Back Ribs: These ribs are prized for their tenderness and rich flavor, making them a popular choice for beginners and experienced pitmasters alike.
- St. Louis-Style Ribs: These ribs offer a larger surface area for flavor development, making them ideal for bold spice rubs and long smoking times. The flatter shape also makes them easier to manage on the grill.
- Spare Ribs: Often less expensive, spare ribs include a thicker layer of fat and require a bit more attention to ensure even cooking. They’re a great option if you’re looking for a more substantial rib, but expect longer cook times.
Once you’ve chosen your cut, consider the quality of the ribs. Look for ribs that are well-marbled with fat, indicating a more flavorful and juicy final product. Avoid ribs that appear dry or overly lean.
Preparing Your Ribs: The Foundation of Flavor
Before the grilling begins, preparation is key. This stage significantly impacts the final taste and texture of your ribs. A well-executed prep process ensures optimal moisture retention and enhances the overall flavor profile.
The Power of the Rub
A good rib rub is more than just seasoning; it’s a symphony of flavors that penetrate the meat, creating a delicious crust and enhancing the overall taste. Consider experimenting with different spice combinations. A classic rub might include brown sugar, paprika, garlic powder, onion powder, salt, and black pepper. Feel free to add chili powder, cayenne pepper, or other spices to customize the heat level.
Trimming the Membrane: A Crucial Step
Many barbecue enthusiasts overlook this step, but removing the membrane (also known as the silverskin) from the back of the ribs is crucial for achieving optimal tenderness. This tough membrane prevents the rub from penetrating the meat and can result in tough, dry ribs. Using a butter knife, carefully loosen and peel away the membrane. This seemingly small step makes a world of difference.
Grilling Techniques: Low and Slow for Rib Perfection
Grilling ribs isn’t about high heat and quick cooking; it’s all about low and slow. The goal is to break down the collagen in the ribs, resulting in fall-off-the-bone tenderness. Here are two popular methods:
The 3-2-1 Method
This popular method utilizes three phases of cooking:

- 3 Hours Wrapped in Foil: Start with a low heat of around 225-250°F (107-121°C). Wrap the ribs tightly in foil with a little bit of liquid (apple juice, broth, or beer) to enhance moisture.
- 2 Hours Unwrapped: After 3 hours, remove the foil and continue cooking for another 2 hours, allowing the ribs to develop a nice bark.
- 1 Hour with Sauce (Optional): During the last hour, add your favorite BBQ sauce and continue cooking until the ribs reach your desired tenderness. Monitor carefully to prevent burning.
The Reverse Sear Method
This method starts with an indirect low-heat cook, followed by a high-heat sear to develop a crispy bark. This method requires careful temperature monitoring but results in an incredible balance of tenderness and crispiness.
- Low and Slow Indirect Cook: Start by cooking the ribs at a low temperature (around 225-250°F (107-121°C)) until they are almost tender.
- High-Heat Sear: Once nearly tender, increase the grill temperature to high heat (around 400-450°F (204-232°C)). Sear the ribs directly over the heat for a few minutes per side to develop a crispy bark.
Choosing Your BBQ Sauce: A Flavorful Finish
The perfect BBQ sauce is a matter of personal preference. Some prefer a sweet and tangy sauce, while others prefer a spicier, smoky option. Consider the flavor profile of your rub when selecting a sauce. You can even make your own BBQ sauce to perfectly complement your ribs.
Troubleshooting Common Rib Problems
Even experienced grillers encounter challenges. Here are some common problems and their solutions:
- Dry Ribs: Ensure adequate moisture during the cooking process. Use foil to wrap the ribs or add liquid to the pan.
- Tough Ribs: Not cooking long enough at a low temperature is the most common cause. Be patient and ensure the ribs are cooked until tender.
- Burnt Ribs: Monitor the temperature closely, especially during the final stages of cooking. Reduce the heat if necessary.
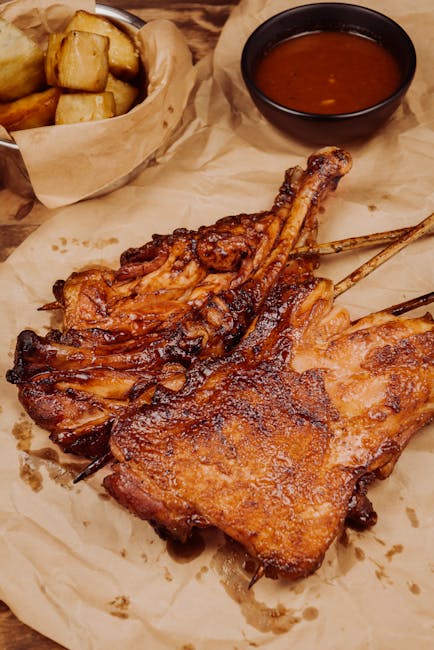
Beyond the Grill: Serving and Enjoying Your Masterpiece
Once your ribs are perfectly cooked, let them rest for a few minutes before slicing and serving. Serve them with your favorite sides, such as coleslaw, potato salad, or corn on the cob. Enjoy the fruits of your labor – delicious, tender ribs that are sure to impress your friends and family!