
Unlocking the Magic: A Comprehensive Guide to Stunning Mushroom Nail Art
From delicate toadstools to vibrant Amanitas, mushroom nail art has blossomed into a captivating trend, offering a unique blend of whimsy and artistry. This comprehensive guide delves into the fascinating world of fungal-inspired nail designs, providing you with everything you need to create stunning, eye-catching manicures, whether you’re a seasoned nail artist or a beginner just starting out.
The Allure of Mushroom Nail Art
The appeal of mushroom nail art lies in its versatility. It seamlessly blends into various aesthetic styles, from cute and kawaii to dark and gothic. The intricate details of mushroom caps, stems, and spores offer endless opportunities for creative expression. Whether you prefer minimalist designs or intricate, multi-layered creations, mushroom nail art provides a canvas for your imagination.
Its popularity also stems from the current trend towards nature-inspired designs. With a growing awareness of environmental consciousness, incorporating elements of the natural world, such as mushrooms, into personal style has become increasingly popular.
Essential Tools and Materials for Mushroom Nail Art
Before embarking on your fungal foray, gather the necessary tools and materials. While the specific items may vary depending on your chosen design, some essentials remain constant:
- Base coat: Protects your nails and ensures long-lasting wear.
- Top coat: Seals your design and adds shine.
- Nail polishes: A variety of colors, including reds, browns, whites, and blacks, are essential for creating realistic mushroom effects.
- Nail art brushes: Fine-tipped brushes are crucial for detailing mushroom caps and stems. Consider investing in a set with varying sizes.
- Dotting tool: A versatile tool for creating small dots and adding texture.
- Nail art stencils (optional): These can simplify the process, especially for beginners.
- Acrylic paints (optional): Provide greater control and detail for intricate designs.
- Clear nail art resin (optional): For creating 3D effects.
Popular Mushroom Nail Art Designs
Classic Red and White Toadstools
This timeless design features classic red mushroom caps with white dots, easily recreated using simple dotting techniques. Experiment with varying sizes of dots and adding delicate white lines for a more realistic look.
Delicate Watercolor Mushrooms
Achieve a soft, ethereal aesthetic by using watercolor techniques. Blend shades of brown, beige, and cream to create a subtle, yet captivating, mushroom effect. This style often incorporates soft backgrounds and pastel colors.
Dark and Gothic Mushroom Manicures
Embrace a darker aesthetic with deep purples, blacks, and greys. Create intricate designs featuring poisonous-looking mushrooms and dark, moody backgrounds. This style often incorporates other gothic elements, such as vines or skulls.
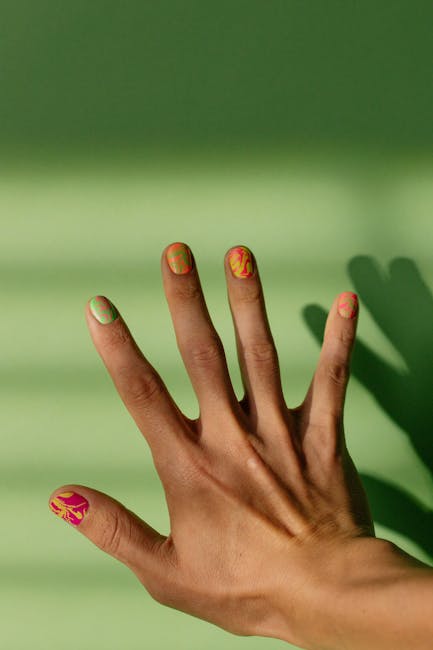
Minimalist Mushroom Accents
For a more understated look, incorporate small mushroom accents on a solid-colored background. This design is perfect for everyday wear and showcases the beauty of simplicity.
3D Mushroom Nail Art
For a truly impressive look, try creating 3D mushroom designs using acrylic paints and clear resin. This technique requires more skill and patience but delivers spectacular results.
Step-by-Step Guide to Creating Simple Mushroom Nail Art
- Prepare your nails: Clean, file, and shape your nails. Apply a base coat.
- Apply base color: Choose a neutral color like white, beige, or light grey as your base.
- Create the mushroom cap: Use a small brush and red or brown nail polish to paint a semi-circle on each nail, representing the mushroom cap.
- Add the white dots: Use a dotting tool or a fine brush and white nail polish to add the characteristic white dots to the red cap.
- Paint the stem: Use a thin brush and white or light brown nail polish to paint a slender stem beneath the cap.
- Apply top coat: Seal your design with a top coat for shine and longevity.
Inspiration and Ideas
Explore various online resources, such as Pinterest and Instagram, for a wealth of inspiration. Search for “mushroom nail art” to discover countless designs and techniques. Don’t hesitate to adapt and modify existing designs to create your own unique style.
Consider incorporating other elements into your mushroom nail art, such as leaves, flowers, or vines, to create a more cohesive and natural look. Experiment with different textures and finishes to add depth and dimension to your designs.
Advanced Techniques and Tips
For more advanced designs, explore techniques such as:
- Negative space: Use negative space to create a more modern and minimalist look.
- Water decals: Use water decals to simplify complex designs.
- Nail art stamping: Use stamping plates to create intricate patterns.
- Ombre effects: Create a gradient effect using various shades of the same color.
Remember to practice your techniques before tackling complex designs. Start with simpler designs to gain confidence and gradually work your way up to more intricate creations. With patience and practice, you’ll be amazed at the beautiful mushroom nail art you can create.
Conclusion
The world of mushroom nail art offers a boundless playground for creativity. Embrace the whimsical charm of these fungal designs and let your imagination run wild. From simple designs to elaborate masterpieces, mushroom nail art is a perfect way to express your unique style and celebrate the beauty of nature.
